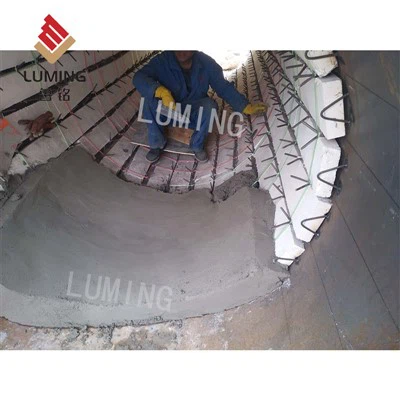
As a reliable silica brick supplier, I'm excited to share with you a comprehensive guide on how to install silica bricks. Silica bricks are widely used in various high - temperature industrial applications due to their excellent thermal stability and resistance to chemical corrosion. In this blog, I'll walk you through the entire installation process, from preparation to the final touches.
Preparation
Site Inspection
Before you start the installation, it's crucial to conduct a thorough site inspection. Check the surface where the silica bricks will be installed. It should be flat, clean, and free of any debris, oil, or moisture. Any irregularities on the surface can lead to uneven installation and may compromise the performance of the silica bricks. For example, if there are bumps or depressions, the bricks may not fit together properly, which can cause gaps and reduce the overall insulation efficiency.
Material and Tool Preparation
Gather all the necessary materials and tools. You'll need the silica bricks, of course. As a supplier, we offer a variety of silica bricks, including Silica Mullite Brick, Semi - silica Brick, and Fused Silica Brick. Each type has its own unique properties and is suitable for different applications.
In addition to the bricks, you'll also need refractory mortar. The mortar should be compatible with the silica bricks to ensure a strong bond. Other tools include trowels for applying the mortar, a level to ensure the bricks are installed horizontally and vertically, a brick cutter for trimming the bricks if needed, and a rubber mallet for gently tapping the bricks into place.
Safety Precautions
Safety should always be your top priority. Wear appropriate personal protective equipment (PPE), such as safety glasses, gloves, and a dust mask. Silica dust can be harmful if inhaled, so make sure the work area is well - ventilated. If possible, use a dust collection system to minimize the amount of dust in the air.
Installation Process
Laying the First Course
Start by laying the first course of silica bricks. Apply a layer of refractory mortar on the prepared surface using a trowel. The thickness of the mortar layer should be consistent, usually around 3 - 5 mm. Place the bricks on the mortar, pressing them firmly to ensure good contact. Use a level to check if the bricks are level both horizontally and vertically. If necessary, adjust the position of the bricks by gently tapping them with a rubber mallet.
Make sure to leave a small expansion joint between the bricks. Silica bricks expand when heated, and these joints allow for the expansion without causing the bricks to crack or break. The width of the expansion joint typically ranges from 2 - 5 mm, depending on the application and the expected temperature range.
Building Up the Layers
Once the first course is laid, you can start building up the subsequent layers. Apply mortar on the top of the previous course and place the new bricks on it. Stagger the joints between the courses to increase the strength and stability of the structure. This is known as "bonding." For example, in a running bond pattern, each brick in the upper course is centered over the joint of the two bricks in the lower course.
As you build up the layers, periodically check the alignment and levelness of the bricks. Use a plumb line to ensure that the walls are vertical. If you need to cut the bricks to fit around corners or openings, use a brick cutter. Make sure to wear safety glasses when cutting the bricks to protect your eyes from flying debris.
Filling the Expansion Joints
After the bricks are installed, fill the expansion joints with a suitable refractory filler. The filler should be able to withstand high temperatures and allow for the expansion and contraction of the bricks. There are different types of refractory fillers available, such as ceramic fiber rope or refractory cement. Choose the filler that is most appropriate for your application.
Finishing Touches
Cleaning the Surface
Once the installation is complete, clean the surface of the silica bricks. Use a brush or a damp cloth to remove any excess mortar or dust from the bricks. This not only improves the appearance of the installation but also helps to prevent the mortar from hardening on the surface of the bricks, which could affect their performance.
Curing
The refractory mortar needs to be cured properly to achieve its maximum strength. Follow the manufacturer's instructions for curing time and conditions. In general, the curing process may involve keeping the installation moist for a certain period of time and then allowing it to dry slowly. This helps to ensure that the mortar develops a strong bond with the bricks.
Troubleshooting
Cracking
If you notice cracks in the silica bricks or the mortar after installation, it could be due to several reasons. One common cause is improper expansion joint design or installation. If the expansion joints are too narrow or not filled correctly, the bricks may crack when they expand. Another possible cause is uneven heating or cooling. Make sure that the heating and cooling rates are within the recommended range for the silica bricks.
Loose Bricks
Loose bricks can be a sign of poor mortar adhesion. Check if the mortar was applied correctly and if the bricks were pressed firmly into the mortar. If the bricks are loose, you may need to remove them, clean the surface, and re - apply the mortar before reinstalling the bricks.
Conclusion
Installing silica bricks requires careful planning, proper preparation, and attention to detail. By following the steps outlined in this guide, you can ensure a successful installation that will provide long - lasting performance in high - temperature applications.
As a silica brick supplier, we are committed to providing high - quality products and excellent customer service. If you have any questions about silica brick installation or if you are interested in purchasing our silica bricks, please feel free to contact us for further discussion. We look forward to working with you on your next project.


References
- "Refractory Handbook" - A comprehensive guide on refractory materials and their applications.
- Manufacturer's instructions for silica bricks and refractory mortar.
- Industry standards and guidelines for high - temperature installations.