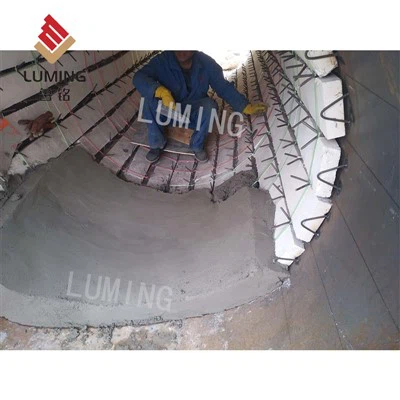
Hey there! As a supplier of Center-hole Bricks, I'm super stoked to share with you how to install these bad boys. Center-hole Bricks are pretty cool and have a bunch of uses, especially in industrial settings where heat management and airflow are crucial. So, let's dive right in!
What Are Center-hole Bricks?
Before we get into the installation process, let's quickly talk about what Center-hole Bricks are. These bricks, as the name suggests, have a hole right in the center. They're often made from high - quality ceramic materials that can withstand extreme temperatures. You can check out more about them on our website Center-hole Brick. They're used in things like regenerative burners and heat accumulators, working hand - in - hand with other components like Spray Nozzle Brick and Ceramic Heat Accumulator.
Tools You'll Need
First things first, you gotta gather the right tools for the job. Here's what you'll need:
- A good quality trowel: This is for applying the mortar. Make sure it's clean and in good condition.
- A level: You don't want your bricks to be all wonky. A level will help you keep everything straight.
- A rubber mallet: This is handy for tapping the bricks into place gently without cracking them.
- Safety gear: Gloves, safety glasses, and a dust mask are a must. You don't want to get any dust in your eyes or lungs, and gloves will protect your hands from the sharp edges of the bricks and the mortar.
- Measuring tape: To ensure you're placing the bricks at the right intervals and in the right positions.
Preparing the Installation Area
The installation area needs to be prepped properly. Start by cleaning the surface where you'll be installing the Center-hole Bricks. Remove any dirt, debris, or old mortar. If the surface is uneven, you might need to level it out. You can use a self - leveling compound for this, but make sure to follow the manufacturer's instructions.
Next, mark out the area where the bricks will go. Use a measuring tape and a chalk line to create straight lines. This will help you keep the installation neat and organized.
Mixing the Mortar
Now, it's time to mix the mortar. You can buy pre - mixed mortar from a hardware store, or you can mix it yourself if you're feeling adventurous. If you're mixing it yourself, follow the instructions on the mortar package carefully. Usually, you'll need to add water gradually and mix it until it has a smooth, creamy consistency.
Don't mix too much at once, as mortar can dry out quickly. You want to have just enough to work with for a short period.
Installing the Center-hole Bricks
- Laying the First Row: Start by applying a layer of mortar to the prepared surface using the trowel. Make sure the layer is about 1/2 - inch thick. Place the first Center-hole Brick on the mortar, aligning it with the chalk line. Use the level to make sure it's perfectly horizontal. Tap it gently with the rubber mallet to set it in place.
- Spacing: You need to leave a small gap between each brick. This is called the joint. Usually, a 1/4 - inch joint is a good size. You can use spacer blocks or small pieces of wood to maintain the consistent spacing.
- Adding More Rows: As you add more rows, make sure to stagger the joints. This will make the structure stronger. Apply mortar to the top of the previous row and the sides of the new brick. Place the new brick in position, level it, and tap it into place.
- Cutting Bricks: Sometimes, you'll need to cut a brick to fit into a corner or around an obstacle. You can use a brick cutter or a masonry saw for this. Make sure to wear your safety gear when cutting bricks, as it can create a lot of dust.
Finishing Up
Once you've installed all the Center-hole Bricks, it's time to finish up. Use a jointing tool to smooth out the joints. This will not only make the installation look better but also help prevent water from seeping in.
Let the mortar dry for the recommended time, which is usually a few days. During this time, try to keep the area dry and avoid putting any heavy objects on the bricks.
Maintenance Tips
After the installation is complete, it's important to maintain your Center-hole Bricks. Regularly check the joints for any signs of cracking or damage. If you notice any issues, you can repair the joints by applying new mortar.
Also, keep the area around the bricks clean. Remove any dirt or debris that might accumulate, as this can cause problems over time.
Why Choose Our Center-hole Bricks?
Our Center-hole Bricks are top - notch. We use high - quality ceramic materials that are designed to last. They have excellent heat resistance and can handle the toughest industrial environments. Plus, we offer great customer service and competitive prices.
If you're interested in purchasing Center-hole Bricks for your project, or if you have any questions about the installation process, don't hesitate to reach out. We're here to help you every step of the way. Whether you're a DIY enthusiast or a professional contractor, we've got the right products for you.
Conclusion
Installing Center-hole Bricks isn't rocket science, but it does require some careful planning and the right tools. By following the steps I've outlined above, you can ensure a successful installation. And remember, if you need any Center-hole Bricks or related products, we're your go - to supplier. So, get in touch with us and let's start your project together!


References
- General knowledge from years of experience in the brick - supplying industry.
- Manufacturer's instructions for mortar and brick products.